Monday, October 8, 2012

Starting on the Smith

Welcome to the Smith River project here in Montana.
For those of you have never been to the scenic Smith River area this should be a treat.  It certainly is my good luck to be able to build in such an extraordinary land.
I will be building a version of my "Prairie Mountain Cabin".   This cabin is a little bigger than the "Montanan" which I showcased in my previous project.  It's basic layout is the same but I will be adding a few extras such as french doors, windows and decks to highlight the magnificent views provided by this location.
We have already started on our foundation.  This will be a insulated post and beam foundation well suited for this location.


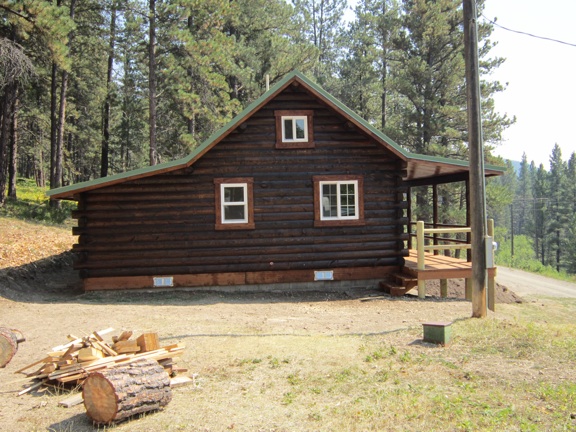
Here are a few photos of the start.

A Few Final Photos

I wanted to end this project with a few shots of the furniture.  I like to supply a few pieces just to get things started.  Then its up to the new owner to get as creative as they like.
For a little additional charge you can have your cabin completely furnished and just move on in!

Thanks to all of you who have followed this project throughout its completion and I welcome you to  take a look at my newest project already started on the Smith River.


Friday, August 31, 2012

Ready To Move In

Well our cabin is nearly complete.
In the last few weeks we have installed the door and windows, and finished off the interior.
We have a new kitchen and bath, complete with new appliances and fixtures.  The interior walls have been covered with blue stained pine and varnished to match the wall logs.  All that's left is to build a rock base and install the wood burning stove.  We will be doing a little finish landscaping to give the place a little more inviting feel.  Finally we will furnish the cabin with a few nice starter pieces of log furniture.
Here are a few photos of what the cabin and site look like today.   Hopefully you see a marked improvement from where we started and that we have created a cabin someone will be able to enjoy for many years to come.


Sunday, August 12, 2012

Roofed and Stained


Our cabin is now securely dried in with a new metal roof.  Before roofing, we put 4 1/4 inches of foil backed insulation underneath.  The cabin will now be very easy to heat in the winter and also stay cool all day in the summer.  I also got the cabin stained last week.  My preference is to use a dark stain, which I believe gives the cabin a more timeless appearance.  I like my cabins to look as though they have been and will be here a long time.
Next,  I will be finishing up my interior wood work and installing the front door and windows.
Remember!  This cabin will be up for sale when completed.  Contact me anytime by phone or email if you're interested.   406-468-3093 or tencentranch@wildblue.net

Monday, August 6, 2012

Interior Work


While waiting for the metal roofing to show up, I have been working on the interior of the cabin.  I have framed up the interior walls, got all of the plumbing and wiring roughed in and put up most of the1x6 blue stained pine and trim. You may notice that the loft now has its posts, rails and stairs installed.  I also managed to get the exterior of the cabin chinked (caulked), and stained.  I will post some photos of the new roof and exterior next week.

Sunday, July 1, 2012

Taking Shape

Here is the cabin taking its final shape.
We finished putting up all of our main support beams, finished our loft, and made the final gable cuts.
Next we set our front porch posts and rails and porch support beam.  All hand peeled from the property.
Then we began putting up our roof decking one section at a time. The roof decking is 2x6 tongue and groove pine.
.


Once decked you get the full picture of what the cabin will eventually become.

Saturday, June 23, 2012

Beams Going Up!

Here are a few shots of one of the ways we use to get our beams up onto the cabin.  The beams are 36' long and 10 to 12 inches in diameter, making them far to heavy to lift by hand.  We used the winch on Tom's truck to pull the logs up the opposite side of the cabin.  A temporary post is anchored to the front wall of the cabin to hang a pulley on.


It's always fun to see these logs go up.  Along with enhancing the appearance of the cabin these beams provide a substantial snow load support.  

Sunday, June 17, 2012

A good start

Well the weather has cooperated as much as can be expected in the mountains in Montana in the spring, but we have been able to get our floor down finally.  The flooring is made of tongue and groove fir decking which I finish by rubbing in stain and then seal with several coats of varnish.
We were also lucky enough to get our logs started before the rain decided to make a return visit.


I will provide more detail on the log construction in next several postings as we progress all the way to our first set of 35' Log roof purlins or "beams".

Neil inspecting the progress

Here is Neil inspecting his new deck and foundation.

The rest is coming soon Neil, I promise.

Green River Delay

Sorry for the delay on postings about the Montanan's Progress.  I had to make a brief visit to the Green River Utah KOA and build two small rental cabins before they got up and running for their summer season.


Here are a couple of shots of that beautiful area and of one of the cabins I built.

Friday, April 27, 2012

Foundation For The Montanan

The weather has been great and we are making progress.

  Foundations can be as varied as the locations you choose to build your cabin on, but the goal is always the same.    We want a solid base which lasts and protects.
Whenever possible I like to use the natural landscape in my foundation designs. I hate scarring the site with excessive cuts and leveling.
For this purpose, I used a two level design which eliminated the need to cut deeper into the hillside.
The upper portion of the foundation will mainly support bedrooms and therefore need less of a crawl space.  The lower portion of the foundation will contain our plumbing and most of the electrical
and so here is where I want a crawl space which is easily accessible and tall enough to comfortably work under.
Here is how we did it.
First we poured an 8x16 inch footer around the entire perimeter. 
Next we built up with block until our wall was level all the way around.
We utilized some of the old trailer's foundation for retaining walls.
After that it was just a matter of attaching pressure treated plates and floor joists.

We still need to put in our insulation and then we are ready for the beautiful tongue and groove fir flooring.
Check back soon!


Sunday, April 15, 2012

The Montanan

Well it's Spring in Montana and time to start a new cabin project.
I will be building a new cabin in the Little Belt Mountains, near Monarch MT.
Neil Bricco is funding this project and he has bought a nice site for me to build on up there.
Upon completion this cabin will be up for sale for anyone interested in a nice weekend cabin or summer home in an absolutely beautiful recreation area.

I will be building the " Montanan". This is a cabin of my own design and its specifics can be viewed on my website. The style and look of this cabin will be similar to the Monarch Cabin which is featured in the video on my previous post.
The Montanan will be larger however, with two bedrooms and a fun sleeping loft for the kids.

I guess it's time to get started!

Here are a few photos of the new site.
Our first project was to remove an old unlivable trailer, several unusable outbuildings and a lot of JUNK.

Next we put in our new utilities and prepared the site for the new foundation.


We are now ready to start our new foundation and cabin.
Check back soon to see the progress!